It’s no secret that Stevie can be… difficult. And I’m being so very kind when I say this. Yesterday he threw such a tantrum leaving the park, that I literally had to drag him by his arms all the way to the car. And when we got to the car, I was so frustrated, I yelled “We are never going to the park again!!”
Yup, I was that mom. It may or may not have been the first time. No. Actually, let me reassure you, it certainly was not the first time. UGH. We’re looking at an average of 10 tantrums per day, over EVERY DAMN THING. So, with the help of his therapists, there are a few new things we are trying with Stevie to make transitions easier GOD IN HEAVEN, PLEEEEEASE. And you know I’ll try anything once. Well, not anything. But to help Stevie, we’ve done it all.
The first is using the timer on my phone to simply countdown to our next activity. 5 more minutes at the park, then we go eat lunch. 4 more minutes! 3 more minutes! Et cetera, et cetera. It hasn’t helped yet. Stevie just says “NO!” every time I give him the warnings. But I’m gonna stick with it. If Supernanny says it works, then by Jove, we will keep trying.
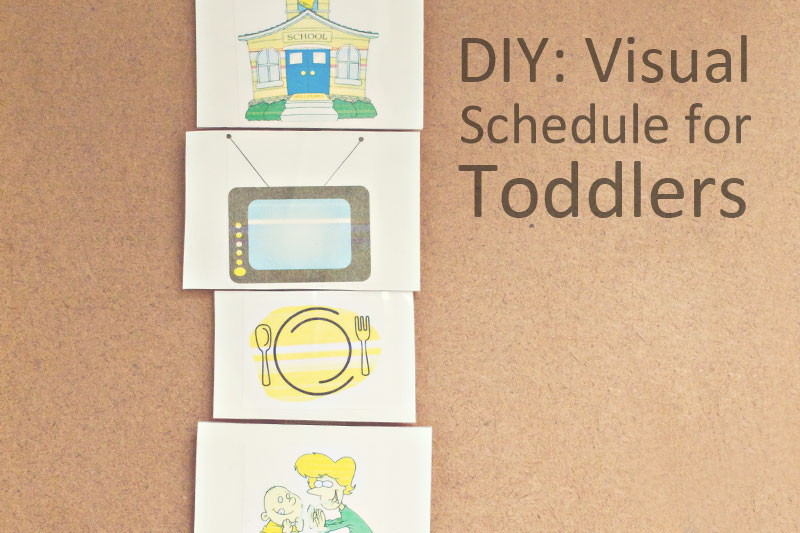
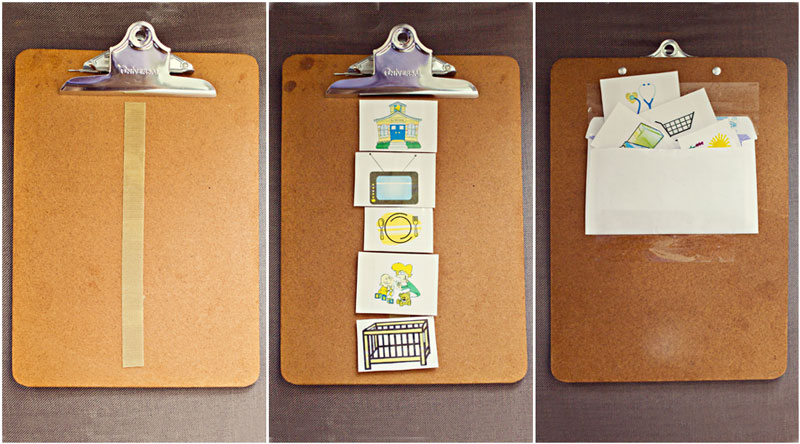
The second is using a visual schedule for the day. It took a little prep time, and it’s kind of ugly and rudimentary. Nothing cute or Pinterest-y about it. But we can call it a “prototype” for now, at least until we see if it works. Here’s how it’s done.
Mine had to be portable, since we are always on the go. But I think a large scale one would work quite well in the home too, maybe on some foam board.
Materials:
- Clipboard
- Paper
- Index cards, cut in half.
- Stick-on Velcro
- Scissors (preferably the “no-stick” kind or ones you don’t mind ruining)
- Clip Art from Google Images of common daily activities. My images included things like School, Meal, Therapy, Outside, TV, Toys, Toothbrush, Bath, Bed.
- Laminating sheets
- Glue stick or tape
- Letter envelope
Instructions to make visual schedule:
- Put selected Clip Art images into Microsoft Word (or another similar program) and make them all close to the same size – about 2 square inches.
- Print the images and cut them into individual squares.
- Tape or glue the images to the index cards.
- Cut the laminating sheets to size and laminate each index card with the image on it.
- Take the rougher side of the Velcro and stick one strip down the middle of the clipboard. Cut to size.
- The softer side of the Velcro should be cut into smaller squares and placed on the back of each laminated index card – also known as Icons.
- The envelope can either be clipped to the front of the clipboard or taped to the back – where you will keep all your icons that are not being used. Mine is taped to the back.
To use a visual schedule:
I break down the day into 3 sections. 1) Morning 2) After school 3) After nap.
I show Stevie the things that are coming up on the schedule by sticking the icons to the clipboard. For instance, in the morning, I will have an icon for Breakfast, an icon for TV Time and an icon for School. When we are done with breakfast, he will remove the Breakfast icon and place it in the envelope, signaling him that we are all done and moving onto the next activity.
When I pick him up after school, I have the next set of icons ready on the clipboard. We remove the School icon and put it in the envelope. Then we move onto Outside Time, Lunch and Nap.
When he wakes up from his nap, I have the next set of icons ready. We remove the Nap icon and move on with the afternoon activities, which may include Toys, Outside Time (again), and his bedtime routine.
Get the idea? We are still very new at this, so I’m not even sure what I’m doing. Just following instructions from his therapists, hoping it helps. If it does or if it doesn’t, you’ll be sure to hear about it from me.
Has anyone else done this? Have you found success? Any tips you can give me?


This type of picture communication is similar to what I saw when I worked in schools a few years ago. It helped quite a bit with students with autism because if they ever got off track or needed to be redirected, they could look at their schedule to know what was next. Routine, schedule, was a great positive thing!
This sounds like a great idea…maybe the pictures and Stevie actively being part of putting the pictures in the envelope may do the trick. I am keeping my fingers crossed!!